
This article covers some details specific to the VISTA series of traditional alarm panels. These panels are extremely popular in North America, have been around for decades, and are marketed under several brand names, including Honeywell, Ademco, and ADT. This article applies to the following models:
- VISTA-10P
- VISTA-15P
- VISTA-20P
- VISTA-21IP
- Safewatch Pro 3000
- VISTA-128 series
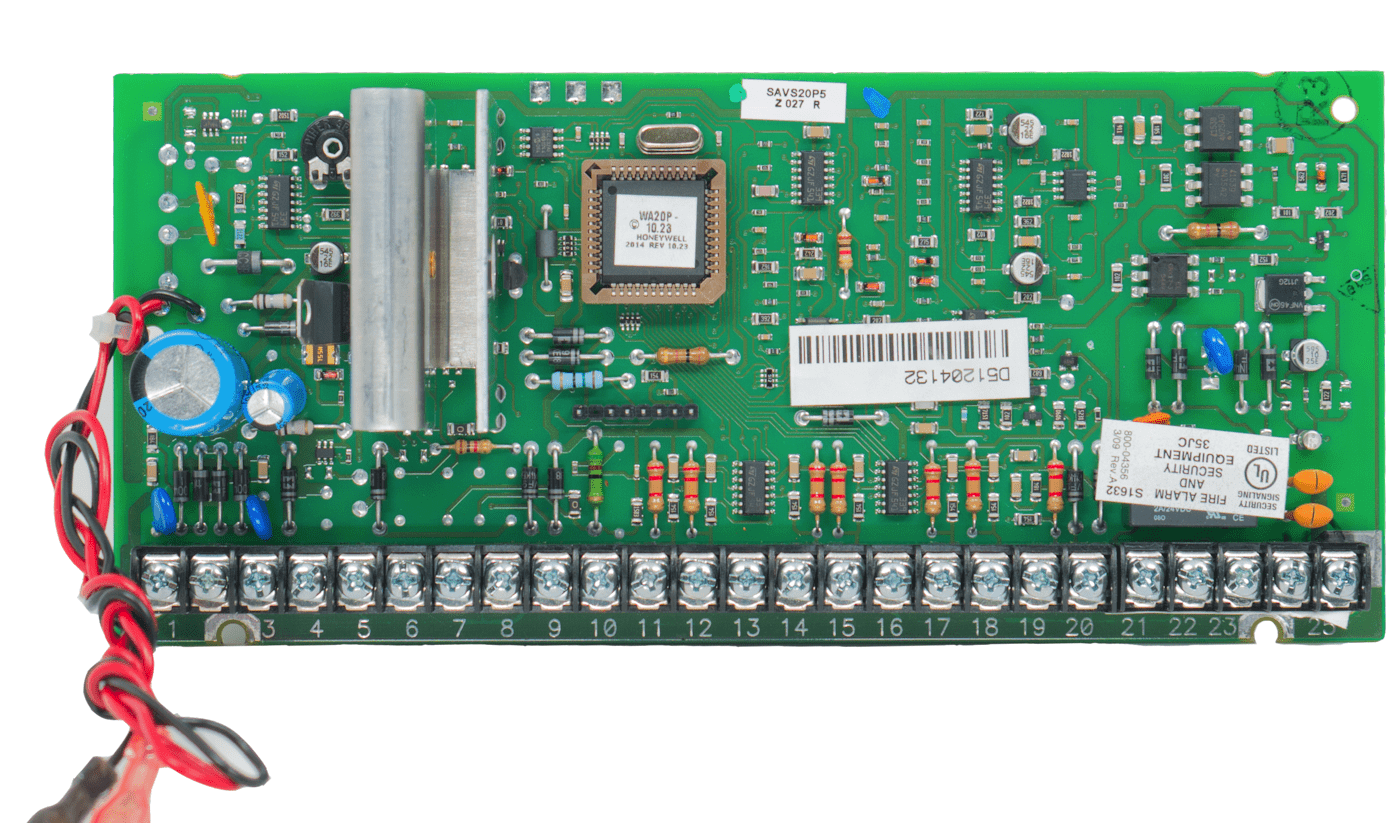
The VISTA 20P shown here lacks clear model identification. The best way to identify is by the PROM chip in the center. This one is marked "WA20P" which indicates that this is a VISTA 20P.
Limitation on Zone 1
All VISTA series panels have an important limitation when used with Konnected -- Konnected cannot tap into Zone 1 on these panels. The reason for this is because Zone 1 on the VISTA panel is a special isolated circuit that can be used with 2-wire smoke detectors. The comparator circuitry on the Konnected Interface module does not work with this isolated zone.
Workaround 1: Relocate important sensors from Zone 1 to a different unused zone. This frees up Zone 1 to be used for a keyswitch instead.
Workaround 2: Use one of the programmable outputs to follow Zone 1, and connect the Konnected Interface module to that output instead. See below for information on programmable outputs.
VISTA Panel Programming Tips
You will need the installer code to program your VISTA panel. The default installer code for most systems is 4112. For ADT Safewatch branded systems, the default installer code is 6321.
If the default installer code doesn't work ask the original installer for the code or try the backdoor method.
You will need a functional keypad with a full-english display, such as the Honeywell 6160. Basic keypads that only have a fixed numeric display will not be able to display the programming menus. Contact us if you are in need of a replacement keypad capable of displaying the programming menus.
Programmable Outputs
VISTA series panels have two built-in programmable outputs that can be connected to zone inputs on the Konnected Interface module. This guide will show you how to program these outputs to (1) indicate the armed/disarmed status and (2) indicate the alarm triggered status.

Programmable output triggers on the VISTA series panels are found in a row of header pins above the zone terminals. From left to right, the first pin is Trigger 1, and the 4th pin is Trigger 2.
Program Triggers 1 and 2 to indicate armed/disarmed status and alarm triggered status
- Connect the first pin (indicated as OUTPUT 17 / TRIG 1 in the diagram) and the fourth pin (indicated as OUTPUT 18 / TRIG 2 in the diagram) to two zones on the Konnected Interface module with female-to-male jumper wires.
- Enter panel programming mode using the alpha keypad:
[INSTALLER CODE] 800 * - Set both outputs 17 and 18 to normally low with the following sequence:
*79 › enter the output mapping menu
17* › output #17
1* › set to normally low
18* › output #18
1* › set to normally low
00 › save and exit - Program output 17 to trigger high when the system is set in armed/stay:
*80 › enter the output programming menu
01* › first program slot
* › continue
2* › activated by zone type
20* › zone type 20 means arm-stay
0* › any partition
2* › stay closed
17* › output #17 - Program output 17 to also trigger high when the system is set in armed/away:
* › return to output programming menu
02* › second program slot
* › continue
2* › activated by zone type
21* › zone type 21 means arm-away
0* › any partition
2* › stay closed
17* › output #17 - Now, program output 17 return to low when the system is disarmed:
* › return to output programming menu
03* › third program slot
* › continue
2* › activated by zone type
22* › zone type 22 means disarmed
0* › any partition
0* › open
17* › output #17 - Moving on to the second output, program output 18 to trigger high when there is an alarm:
* › return to output programming menu
04* › fourth program slot
* › continue
2* › activated by zone type
33* › zone type 33 means burglar alarm
0* › any partition
2* › stay closed
18* › output #18 - Finally, program output 18 to return low when the alarm is disarmed:
* › return to output programming menu
05* › fifth program slot
* › continue
2* › activated by zone type
22* › zone type 22 means disarmed
0* › any partition
0* › open
18* › output #18 - When finished programing, exit:
00 › exit the menu
*99 › exit installer mode
Keyswitch Zone
Any zone on the VISTA series can be programmed as a Keyswitch zone type. A keyswitch zone triggers the alarm system to arm or disarm when a momentary contact is made on that zone. Think of a physical key and making a momentary turn to arm/disarm the alarm -- with Konnected we can use a relay to programmatically make that momentary circuit closure and remotely arm or disarm the alarm.
Choosing a Zone
You must have an unused zone on the VISTA panel to use as a keyswitch. This zone cannot also be used as a sensor zone. Any zone can be used for a keyswitch zone, but Zone 1 requires the use of a 2000 ohm resistor. All other zones can be wired without a resistor.
Programming the Keyswitch Zone
For this example, we'll use zone 8 as our keyswitch zone, but you can use any available zone.
- Enter panel programming mode using the alpha keypad:
[INSTALLER CODE] 800 * - Program zone 8 as a keyswitch zone.
*56 › enter zone programming mode
0 › no confirmation
08* › select zone 8
* › continue
77* › zone type 77 means keyswitch
1* › partition 1
* › skip report code
1* › (only on zones 2-8) set hardwire type to 2 (Normally Open) to not need a resistor
* › confirm response time
* › confirm summary
* › skip program alpha - When finished programing, exit:
00 › exit the menu
*99 › exit installer mode
Set up the Momentary Switch
Follow the zone setup steps for your platform to configure a momentary switch on the Konnected zone that's attached to your relay. On the VISTA series panels, a momentary contact of 0.5 to 1 second will set the panel to Armed-Away. A momentary contact of greater than 1 second will set the panel to Armed-Stay.