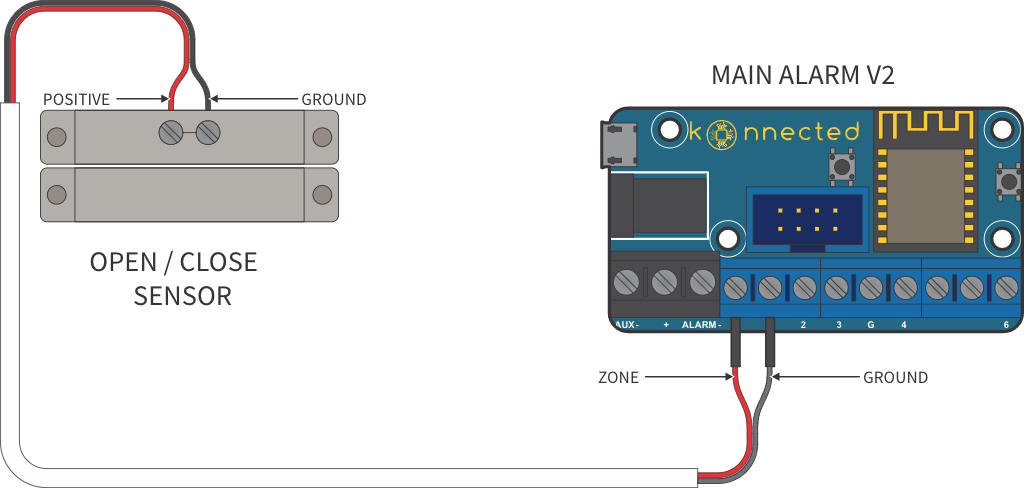
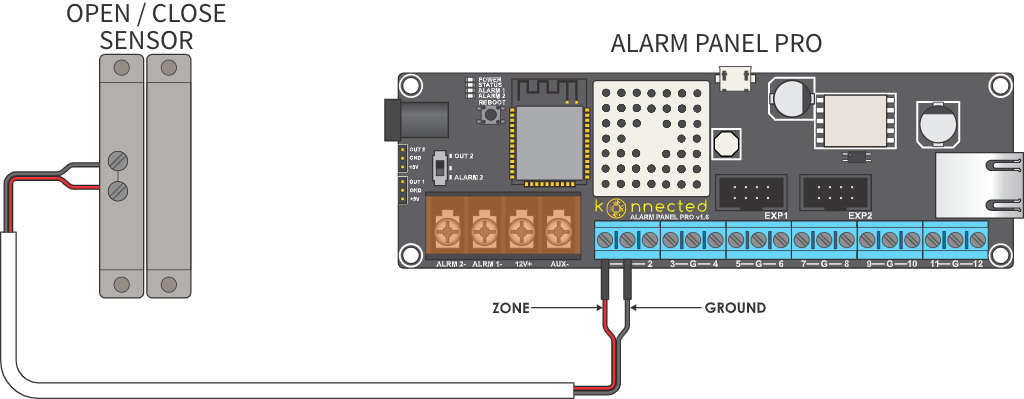
Wiring your door and window sensors to your Konnected board with your Conversion Kit involves identifying wire pairs, removing all resistors from each zone or sensor, andconnecting them to the Numbered Zone and G terminals.
Door and Window Sensors (Contact Sensors)
Door and Window Sensors are referred to as Contact Sensors because they activate when the two halves of the magnetic sensor come in contact. When the door or window opens, the contact is broken.
Identify Wire Pairs for each Sensor
Alarm Panel v2
Alarm Panel Pro
- Contact sensors have two wires coming out of each sensor. Identify the pair of wires coming out of your wall for each sensor and put one side in Numbered Zone and the other side in the G (Ground). It doesn't matter which wire goes on which side.
- If you’re removing sensors from an old existing alarm panel, they may be wired with end-of-line resistors. Remove the resistors and discard or save them for a different project.
- You may have multiple sensors wired in series to create zones. You can keep them wired together in zones, or disconnect the wires from each other to monitor each sensor individually. There’s no limit to the number of sensors you can have in SmartThings, but you are limited by the number of inputs available on your Konnected device. You can add as many konnected devices as you want to your system. Each can monitor up to 6 sensors.
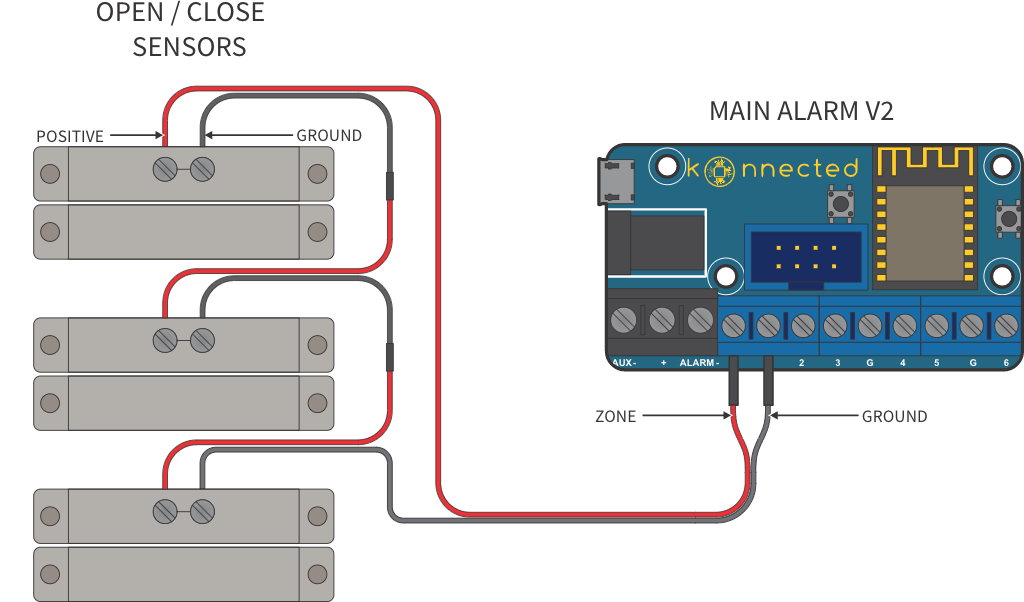
Alarm Panel v2
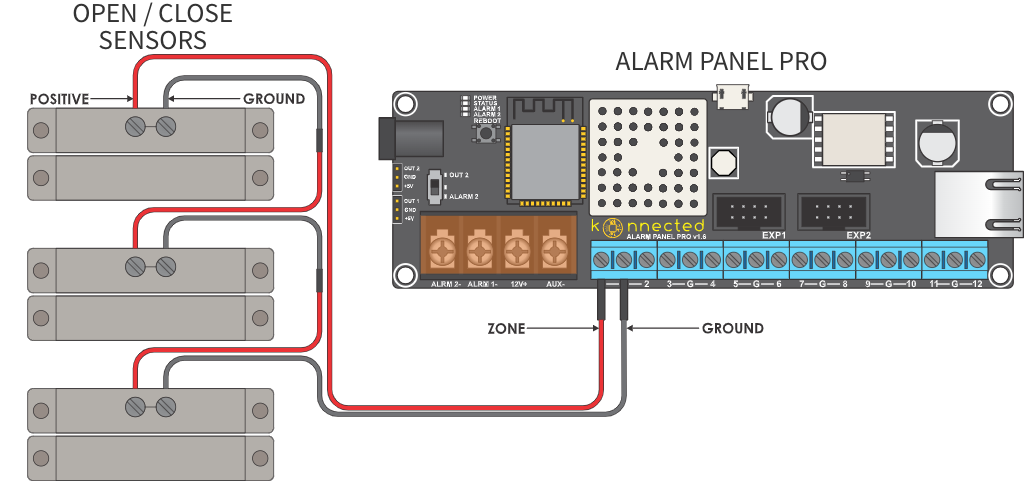
Alarm Panel Pro
Zones
Zones are two or more sensors wired together in series. When any one door or window in the zone is open, the zone reports it as open.
Connect zones the same way you’d connect a single sensor, connecting the first and last wire in the series to G and to input.
Sensors with Configurable Contacts
Most alarm system door and window sensors are hard-wired to be normally open (NO). Some contact switches have both NO and Normally Closed (NC) contacts. If your hardware has this option, use the NO contact.
Next Step: Wiring your Motion Sensors


